 Loading... Please wait...


- Home
- Theme Features
- Theme Setup


Theme Setup
After installing CRAZE there are a few steps you want to take to ensure a high quality experience. Here it goes
Login to your admin panel and proceed with the instructions below
Design › Carousel & Social Media- Optimal carousel image sizes: 1130px x 540px
(Images used throughout the website are just for illustration. Usage of these images to your Live website is highly prohibited.) - Make sure “Use Theme Icons” is selected under "Social Media" section
Make sure “Yes, automatically resize my logo for me if required” is unchecked
Setup & Tools › Store Settings › Display- Featured Products: 8
- New Products: 8
- Recent News Items: 10
- Products per Page: 8, 12, 16 or 20
- Cart Quantity Boxes: Text Box
- Product Breadcrumbs: Show one only
- Products Related by Views: 8, 12
- Enable Product Tabs?: NO
- Category Display Mode: Show products in a list
- Category Menu Style: Show categories in a simple list
- Menu Display Depth: 2
- Storewide Thumbnail: 200 x 300
- Product Page Image: 450 x 650
- Product Page Thumbnail: 135 x 100
- Category Image Dimensions: 350 x 350
- Brand Image Dimensions: 350 x 350
- Product Display Mode: Show products in a list
- Results per Page: 8, 12, 16 or 20
Header
Phone Number:

Add this Phone Number via admin panel. To do so, Login to your admin panel and go to Setup & Tools › Profile and add your phone number in the Phone number field (as Highlighted in Screenshot below)

Multiple Currency Selector:

It appears only you’ve multiple currencies added to your store. To add multiple currencies go to Setup & Tools › set up your store › Currencies. To add a new currency to your store's list of supported currencies, click the Add a currency button. Fill out the Currency Details & Display section. To edit an existing currency, click the Action wheel and choose Edit and save it.
Now! Your currency will be displayed on your website as a dropdown as seen on the screenshot above
Homepage Small Banner:

- Go to Marketing › view banners
- Click on Create a banner
- Give a Name and add the given code for the banner.
- Change the yellow highlighted line to the path of the image. Note: You can use IMAGE MANAGER of the admin panel to upload your images and use its image path/image location in ease.
- Change the red coloured sentence to the link you wish.
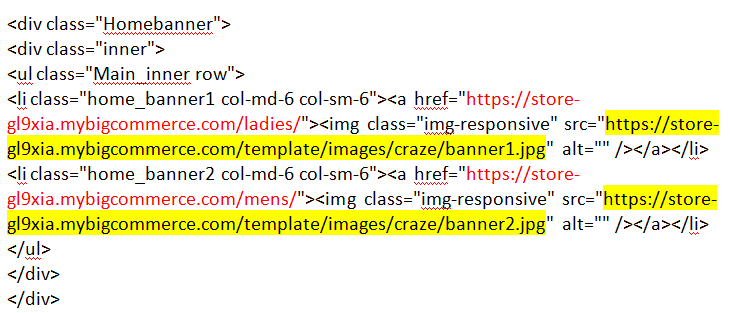
Banner code:
<div class="Homebanner">
<div class="inner">
<ul class="Main_inner row">
<li class="home_banner1 col-md-6 col-sm-6"><a href="%%GLOBAL_ShopPath%%/ladies/"><img class="img-responsive" src="%%GLOBAL_ShopPath%%/template/images/craze/banner1.jpg" alt="" /></a></li>
<li class="home_banner2 col-md-6 col-sm-6"><a href="%%GLOBAL_ShopPath%%/mens/"><img class="img-responsive" src="%%GLOBAL_ShopPath%%/template/images/craze/banner2.jpg" alt="" /></a></li>
</ul>
</div>
</div>
Footer
Design › More › Template FilesFooter
Design › More › Template Files

Now you will see a full list of your template files. Open the folder “Panels” and choose a file to edit, click on Action and select Edit.

Quick links
Choose “FooterOursupport.html” to edit Quick links
Add or remove the "li" tag to add/remove links. Add link in "href" and text in between the "a" tag (as highlighted in screenshot below)
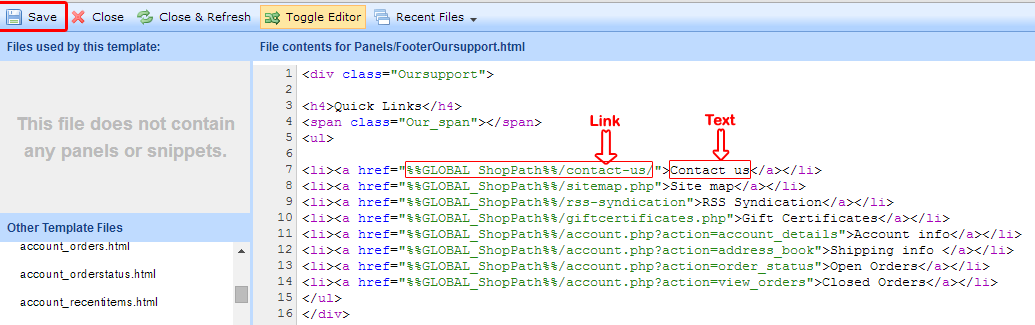
<div class="Oursupport">
<h4>Quick Links</h4>
<span class="Our_span"></span>
<ul>
<li><a href="%%GLOBAL_ShopPath%%/contact-us/">Contact us</a></li>
<li><a href="%%GLOBAL_ShopPath%%/sitemap.php">Site map</a></li>
<li><a href="%%GLOBAL_ShopPath%%/rss-syndication">RSS Syndication</a></li>
<li><a href="%%GLOBAL_ShopPath%%/giftcertificates.php">Gift Certificates</a></li>
<li><a href="%%GLOBAL_ShopPath%%/account.php?action=account_details">Account info</a></li>
<li><a href="%%GLOBAL_ShopPath%%/account.php?action=address_book">Shipping info </a></li>
<li><a href="%%GLOBAL_ShopPath%%/account.php?action=order_status">Open Orders</a></li>
<li><a href="%%GLOBAL_ShopPath%%/account.php?action=view_orders">Closed Orders</a></li>
</ul>
</div>
About us
Choose “FooterAboutus.html” and Edit the text in between the HTML tags (highlighted in screenshot below)
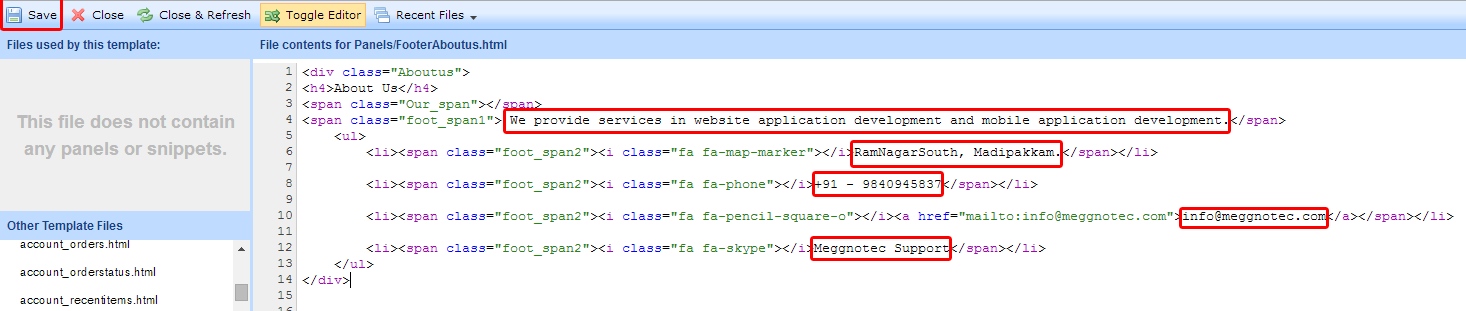
<div class="Aboutus">
<h4>About Us</h4>
<span class="foot_span1"> We provide services in website application development and mobile application development.</span>
<ul>
<li><span class="foot_span2"><i class="fa fa-map-marker"></i>RamNagarSouth, Madipakkam.</span></li>
<li><span class="foot_span2"><i class="fa fa-phone"></i>+91 - 9840945837</span></li>
<li><span class="foot_span2"><i class="fa fa-pencil-square-o"></i><a href="mailto:info@meggnotec.com">info@meggnotec.com</a></span></li>
<li><span class="foot_span2"><i class="fa fa-skype"></i>Meggnotec Support</span></li>
</ul>
</div>
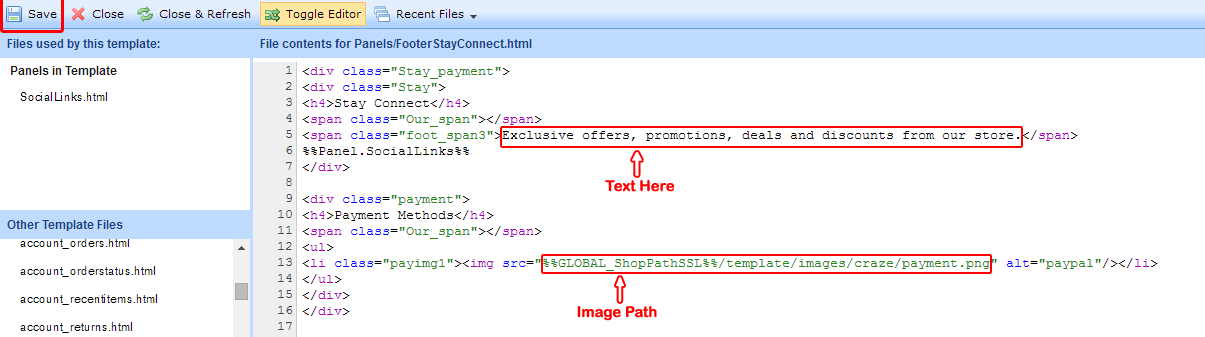
Stay Connect & Payment Methods
Choose “FooterStayConnect.html” and copy your new payment image path/link and paste it in the Image path (highlighted in screenshot below) between the quotes.

 Meggnotec